Models made by Airbrushheaven staff

Models made by Airbrushheaven staff

Friday, 11 March 2016

1/35 "Ingram 2" Patlabor - Part 2


The upper part of the legs will barely be seen, but that doesn’t stop me from painted them once built. Once the units were put together as in section 4 of the instructions they were sprayed in Vallejo Plate Mail primer (VAL 70.628) & allowed to dry.
Time to spray all outer leg armour parts & all of them were given a light sanding to remove any nub marks where they were taken off the sprue, but it also helps as washing them after also removes any mould release agent that can affect the paint going onto the plastic.
As mentioned at the start these were painted in a few light coats of Vallejo white primer (VAL 600) with light sand between coats when it was fully dry. Please make sure it is dry before you start to sand the primer.

It was at this stage I decided to do some detail work on the lower legs & my using a small amount of the following paints gave them a bit of a lift. I used Vallejo “Metal Color” Magnesium ( 77.711), Exhaust Manifold ( 77.723) & some “Ammo Of Mig” Old Brass (A.MIG-190)


The outer parts easily clipped into place & I left the legs on one side till later.

 Looking at the lights in the waist they are meant to be orange, but in the kit they are clear.  I have some “Ammo Of Mig” Crystal Orange (A.MIG-097) that will do the job nicely with 3 light coats.

The waist parts were sprayed in white & black primer then went together as in section 8, but I left off the rubber gaiter till a later stage.
Slight accident here as I dropped an open permanent paint marker on the waist unit while doing another model so had to re-spray the top after masking the rest off.

Friday, 4 March 2016

1/35 "Ingram 2" Patlabor - Part 1


Moved away from armour kits for a while & going back to one of my 1st loves Sci-Fi, or in this case more correctly Gundam & Anime.

This kit is called “AV-98 Ingram 2” & is meant to be a 1:35 scale model of the armoured unit used by Tokyo police in the TV series.  These are meant to be just a snap fix kit with no painting, but I always paint & try to remove as many seam lines as possible, so here is how I built mine.

For all the white parts I am going to use my stock Vallejo white primer (VAL 600) as it goes on well, has a slight satin sheen when sprayed in very light coats & will not hide any of the kits detail.

To make both feet I put the “poly cap” (PC J) into part F14 & glued this & F15 together.  The seam lines were sanded down & the unit sprayed in Vallejo Plate Mail primer (VAL 70.628).
Finished ankle joint on Ingram 2 after sanding & painting

The sole of the foot (A3) & the base (A1) were glued together & allowed to dry.  The completed base & heel (A11) were sanded and sprayed Satin Black & allowed to dry.  The tops of the foot (I6) & (I1) were painted white then all the parts just press into the foot support.

Finished foot of the Ingram 2

The right hand leg has an opening side where a pistol sits & a mechanism pulls the gun out when the outer armour is moved.  The inner working (E9,16,17,23,24,25 & 30) were sprayed in Plate Mail  primer. 
Painted inner leg working of the Ingram 2
As the leg interior may be on show it will be painted & have some details added. The whole leg parts were primed with grey primer (VAL 601). The insides of part (D8 & D20) were given several light coats of Exhaust Manifold ( 77.723) from the Vallejo “Metal Color” range were applied to the inside. When dry the inner was masked & the outer sectioned sprayed with “Metal Color” Aluminium ( 77.701). This gives just a slight colour change when you put the final leg together.

Sprayed inner & outer parts of right hand leg of the Ingram 2
The inner working just push fitted together but pay attention to the manual as to how to fit part E30 as this need to move a certain way. 
Finished frame of the lower right hand leg of the Ingram 2

The left leg has no moving parts, but to keep the same colour scheme the parts D7 & D19 were primed & the inner & outer parts sprayed the same Exhaust Manifold & Aluminium colours.  The small fixing pieces for the legs (D14,D15,E18 & E19) were sprayed with Plate Mail  primer.

Friday, 19 February 2016

1:12 Porsche 910 :- 15- Final assembly & decals


Homeward stretch now & the Porsche is nearly finished.

Time to do the final bits to the upper body.  The front section under the bonnet needs completed oil cooler fitted. The instructions show no pipe work going to it, so I drilled 2 small holes where the hoses should, in my view, come out & in the back of the cooler & by using a bit of scrap tubing made some pipes

The rear section of the body had the surrounds & lights fitted using clear glue as not to affect the red lens.

Now the oil cooler has set in place I masked off the inside of the front lights so I could spray them with Vallejo Black primer as it gives a nice satin effect.  Getting normal masking tape to go round small corners has been a problem for me until now.  I found some flexible masking tape that is only 2mm wide & more importantly stays in place. A couple of light coats are all it required.
The 4 headlights fronts have a small notch at the bottom, so please take note when gluing them in place as they will not sit correctly if not.
Using clear glue I fitted the lights & indicators then the top clear cover was fitted with a small amount of glue.
Honesty time here I made a right mess of the masks in the kit for the black surrounds to the windscreen in section 21, so had to mask it using the flexible tape & then spray it. The completed screen & dashboard were glued in place.

The reaming small parts for the front including the wipers were painted & put in position. 
When it came to the decal part I decided to use just a few of them as the kit was not an accurate representation of an actual car, but one that had been brought but still raced in classic races.  With the paint being a gloss the decals stuck to the surface very well & did not need any kind of extra softener or fixing agent.
 

The final stage was just to give the engine bay a slight touch of weathering to show the car was in use, but looked after.


There you have it & again my apologies in the time it took to do this blog & can guarantee the next one will not take as long.

Friday, 15 January 2016

1:12 Tamiya Porsche 910 :- 14- Body & interior work


As I am nearing completion of the Porsche though it time to do some preparation work on the top of the car.
I had a look at the way the roof section (part J12) fitted onto the rear section to see the gap was too large for my personal choice.  The best thing for me was to glue this in position then just give it a light sand so that the join was still visible but was secure.  I then fitted the rear engine cover (J7) under the air intakes.  I masked off the top of the body & sprayed the whole inside with the same Matt Tank grey (Humbrol 67) as the floorpan.


Painted underside to body on Tamiya Porsche 910


After a few days to make sure the paint was fully cured I masked off the inside areas & gave the whole upper body light coats of the blue used on the underside & giving it a very light sand between coats to remove any imperfections. After about 5 light coats I got the desired paint finish I was looking for.
Painted top body of Tamiya Porsche 910

To let the car paint totally cure & harden, which can take days under normal temperatures, I did some work on the pedals by giving them a light sanding  down to remove some flash marks. The pedals were painted black & the shafts in aluminium.

Painted pedals on Porsche 910

Seat & pedals fitted to floor of Porsche 910


The wheels I did in blog post No.11 were fitted with the wheel nuts left in the chrome to just give them a slight accent.

Front wheels fitted to Porsche 910Rear wheels fitted to Porsche 910

Now comes a part that even now I still don’t like… fitting large clear parts into models.  Somehow I cannot get the great finish & unblemished  ones seen in models done by my peers, so have to do my own work around. As this part should not be touched when I’ve finished the kit I used some canopy PVA glue in a small bead around the bulkhead, then held the clear plastic in place with soft ended pegs while it set.
Fitting rear glass to Porsche 910

This did set the plastic in place, but I can still some small sections where it looks like the glue hasn’t stuck it down fully.  Tips please required on how to get a better job done of clear parts J.

Friday, 27 November 2015

1:12 Tamiya Porsche 910 :- 13- Seatbelts & bulkhead work


Time to do some more sub-assembly work & make the seatbelts in section 12 & 13.  

First job was to make the locking buckle that comes in 5 parts of small photo-etched metal.  I used a very fine set of sprue cutters to take the parts of the photo-etch frame & a light filing down where the remaining nub of metal still stood.  I found that the very thin superglue is the best for these kinds of parts & just built them up in order in the diagram.
The seatbelt straps are the usual kind Tamiya have with a plain sticky side & a fabric effect on the other.  Take your time & care when making the belts up as the straps are of different sizes & need to be folded in a particular way to look right. They will lose adhesion if you have to keep taking them apart & re-fixing them, so best to read the fitting guides well for each strap before you start.

I do find that even when carefully taken off the backing there are sometimes fine loose strands that need just a trim on the edges after making the belts.
Completed seatbelt straps for Tamiya Porsche 910


Both seats were sprayed with Satin Black primer then, when dry, the belts were folded over & a small amount of superglue on the back of the seat holds them in place. The completed seats were left on one side for later fitting.
Finished seat for Tamiya Porsche 910

 Still some final bits of work are needed on the rear bulkhead/engine area as in section 11 & 14 where I need to fit the battery & circuit breakers from way back in blog post No.10.  I fitted the battery & circuit breakers to the bulkhead, then fitted the 2 painted cylinders (C28) & the vinyl tubing that bends to fit behind the bulkhead.

The 2 tanks & the large rubber tubing in section 14 then fitted in behind the already pre-fitted bulkhead.
Fitted battery & circuit breakers to Tamiya Porchse 910

Friday, 23 October 2015

1:12 Tamiya Porsche 910 :- 12- Fixing build & kit issues


Going to leave the chassis for a while to sort out faults with some parts & kit mould marks before I get to work on the rest of the build.

One major problem is the pipes for cooling the brakes & gearbox in section 8.  When I did a test fit I could see there was gap between to 2 halves, but only when they were glued together could I see how bad it was as shown in the picture below.

Large gap in part on Tamiya Porsche 910


There may be other ways to repair this, but I put a couple of thin strips of plastic card into the hole to narrow the gap, then using thick gap filling superglue put some in to part fill the hole in.  When dry I put a bit more in to just above the good part of the pipe, then gave it a light sand to re-form the shape of the pipe.

Repaired intake pipe on Tamiya Porsche 910


Once I had the basic shape I used both medium & thin superglue where needed on the rest of the pipes to produce a smooth finish.  After sanding one of the thin glue stages I checked on how it was going by my usual technique of putting some paint on the pipe to show any areas that still required work. 

Test painted intake on Tamiya Porsche 910

After 2 layers of the thin glue I had got the pipes to how I liked & then gave then a final coat of Matt Sea Grey (Humbrol 27).
Primed air intake on Tamiya Porsche 910
The bonnet & roof sections (J10 & J12) have very large round mould marks that needed some filler, then thin superglue treatment to make a smoother appearance.

Roof & bonnet repair to Tamiya Porsche 910

Now comes another case of bad fitting.  When doing a test fitting of the air intakes that feed to the ill fitting earlier pipes there was a very large gap between the body & pipe when fitted in the correct position. 
Using various thicknesses of plastic strip ranging from 0.5 X 4.5mm down to 0.25 X 0.5mm I started to carefully build up a piece to fit the gap.  Between each layer I did a test fit to see how it was going & what still needed to be done.

Fixing gap in air intake on Tamiya Porsche 910

When I had got as close to the desired look possible with my skills I trimmed off all the excess pieces of card to give me the final filling piece.  As you can see the LHS & RHS are different showing how poor the fit is on the model.

Completed filler part for intake on Tamiya Porsche 910

The bridging pieces were then glued into place & a final coat of thin superglue & sanding to make a very nice smooth appearance.
Close up of fininshed repair to intake on Tamiya Porsche 910.

Friday, 9 October 2015

1:12 Tamiya Porsche 910 :- 11- Wheels & front suspension


The completed front bracing was fitted & glued in place with no problems as it dried in the correct position previously.  The completed supports for the steering rack were glued in place & allowed to dry.

While this was drying time to work on the wheels & front suspension.

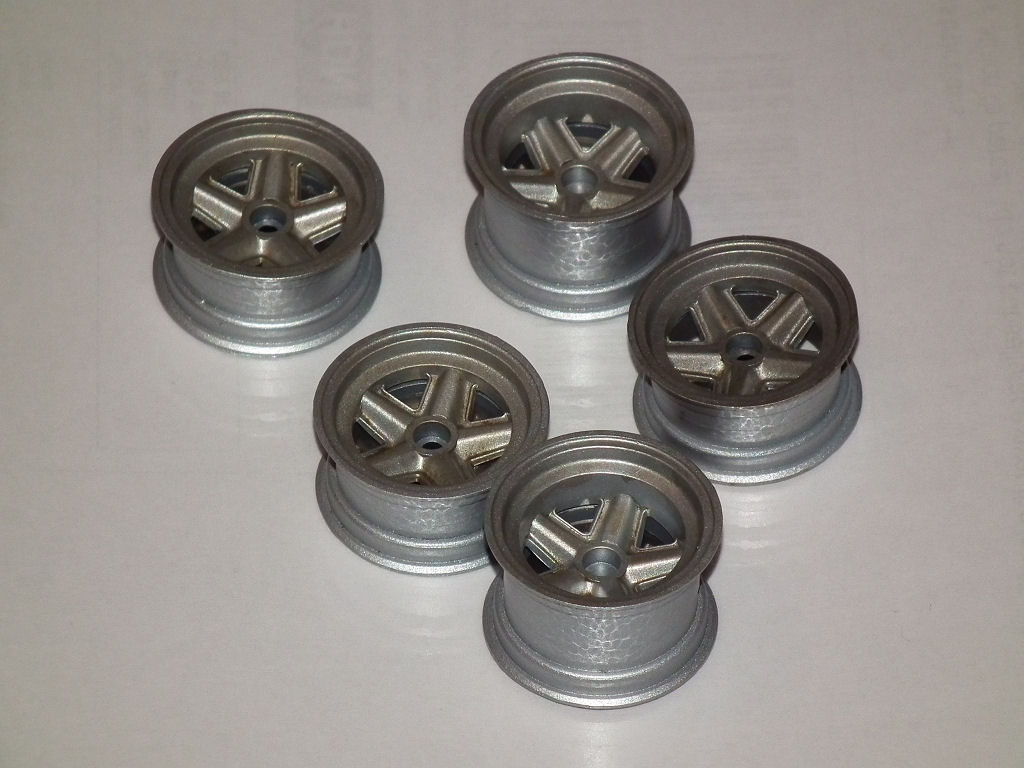
The brake discs were sprayed in matt aluminium on one side & the other was super-glued the metal discs. The wheels were painted in a Matt Aluminium, but when I did a test fit to me it just looked too shiny.

Wheels on Tamiya Porsche 910 too shiny


To dull the wheels I gave them a light airbrush coat of Matt Antique Bronze (Humbrol 171) just to give some contrast to the brake discs.

re-coated Tamiya POrsche 910 wheels to dull them down.


As usual with most models the rubber tyres come with a mould mark going down the middle which needs removing.  I use a very sharp scalpel blade to take the larger parts off, then using a coarse then fine sanding stick finish off the seam & the whole tread area gets a fine sand to give it a used look.

Picture of sanded down tyres of Tamiya Porsche 910


The finished tyres were just placed on the wheels for fitting later.

Back to the dried front section & the steering rack & rubber gaiters ( A5 & L2) went in place & the shift lever assembly glued to the floorpan.


The front suspension parts from section 15 were painted in the Satin Black used in previous parts & then highlights of Matt Aluminium to bring out the bolt heads.

Tamiya Porsche 910 front suspension painted


The springs were sprayed in the matching Humbrol Dark Red as the rear springs.

Tamiya Porsche 910 springs painted red


The whole front suspension was fitted as in section 16 of the instructions & allowed to set,

Front suspension fitted to Tamiya Porsche 910