Going to leave the chassis for a while to sort out
faults with some parts & kit mould marks before I get to work on the rest of the build.
One major problem is the pipes for cooling the brakes &
gearbox in section 8. When I did a test
fit I could see there was gap between to 2 halves, but only when they were glued
together could I see how bad it was as shown in the picture below.
There may be other ways to repair this, but I put a couple
of thin strips of plastic card into the hole to narrow the gap, then using
thick gap filling superglue put some in to part fill the hole in. When dry I put a bit more in to just above the good part of the pipe, then gave it a
light sand to re-form the shape of the pipe.
Once I had the basic shape I used both medium & thin
superglue where needed on the rest of the pipes to produce a smooth
finish. After sanding one of the thin
glue stages I checked on how it was going by my usual technique of putting some paint on the pipe to
show any areas that still required work.
After 2 layers of the thin glue I had got the pipes to how I
liked & then gave then a final coat of Matt Sea Grey (Humbrol 27).
The bonnet & roof sections (J10 & J12) have very
large round mould marks that needed some filler, then thin superglue treatment
to make a smoother appearance.
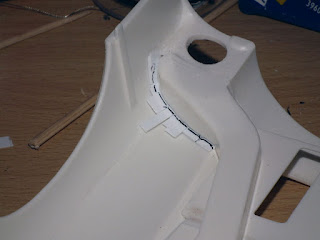
Now comes another case of bad fitting. When doing a test fitting of the air intakes
that feed to the ill fitting earlier pipes there was a very large gap between
the body & pipe when fitted in the correct position.
Using various thicknesses of plastic strip ranging from 0.5 X 4.5mm down to 0.25 X 0.5mm I started to carefully
build up a piece to fit the gap. Between
each layer I did a test fit to see how it was going & what still needed to
be done.
When I had got as close to the desired look possible with my skills I
trimmed off all the excess pieces of card to give me the final filling
piece. As you can see the LHS & RHS
are different showing how poor the fit is on the model.
The bridging pieces were then glued into place & a final
coat of thin superglue & sanding to make a very nice smooth appearance.


No comments:
Post a Comment