Models made by Airbrushheaven staff

Models made by Airbrushheaven staff

Friday, 3 June 2016

1/48 Zaku II - Part 3


Time to do a bit of work on the torso, but with the way the kit is made there are very few parts for such a big kit & again only some painting will enhance the model.  The main upper torso is only 2 parts with polycaps & the shoulder joints added.  All that was needed was a bit of filler & sanding before my standard priming routine. All the waist torso consists of is 2 parts & a polycap.
1/48 Zaku II torso primed ready for top coat
 
I made an error with the side armour for the torso so it was given a sanding due to me getting a bit too vigorous with the scalpel blade when trimming off the nubs & then primed for later painting.

Side armour primed on 1/48 Zaku II
 
The shoulder joints are very basic with an inner piece fitted with polycap that sits inside 2 more polycaps.  To give a bit of detailing the inner pieces were primed then sprayed in Aluminium., when dry I put some masking tape over them, fitted them in place & then glued the 2 shoulder joints together. These were sanded filled & primed ready for the top coat.
completed & primed shoulder joint on Zaku II 

To make the elbow joint I used, like the knee, a normal way of modelling & not the way they show. Please check the way the poly caps fit at the bottom as I forgot & wondered why it would not go together at first. Like with knee part F10 was primed, painted in Dulaluminium before fitting then the finished unit primed & painted in the same colour.
1/48 Zaku II painted elbow joint
 
Not much work needed to make the lower arm as it’s just 2 pieces with polycaps, so it was glued, sanded then primed as usual.
Primed lower arm section on Zaku II
 

Friday, 27 May 2016

1/48 Zaku II - Part 2


I gave the sanded upper feet a touch up of primer, then masked off the inner ankle joint finally sprayed the foot with Vallejo Light grey ( 71.050). To add a bit of detail to the upper foot I used some Gun Metal Grey to represent bolts. For the foot base I did some detailing with Dulaluminium, Magnesium & Brass.
Painted feet of 1/48 Zaku II
When dry the 2 parts of the feet snapped into place with no glue.

Finished feet on the 1/48 Zaku II
The lower leg is mainly 2 large pieces with some back detailing on, so I am going to do this as a complete unit to ease in painting.  The 2 side pieces have poly caps fitted in them & then I glued them to make sure they will hold the weight of this large kit. The 2 detail parts for the rear were glued in place. The seam lines were sanded & filled as normal, then primed in my usual manner.

Primed lower legs for the Zaku II

Now comes the part where I can begin to give the legs some colour & detail as with this being a kit without an inner frame & a lot of moulded in detail the paint job needs to bring a lot of this out.

The legs were sprayed in the darker of the 2 blue colours I’m using which is UK Mediterranean Blue (71.111) & 3 good light airbrush coats did the trick. To bring out the detail of the rocket verniers I  hand painted the recessed areas in “Metal Color” Steel (77.712), did the verniers in Dulaluminium then the inner section of the Vernier in Burnt Iron (77.721).
Using a cocktail stick I put very small amounts of Gun Metal Grey in the bolt holes & recesses on the leg, then as a final touch used Aluminium on the small vanes on the side of the legs.
Detailed painting on legs of Zaku II

The whole unit was put safe wrapped up for final fitting later on.

For making the knee joint I will not be following how the instructions say, but making each one like a standard model kit.  Part (F9) was primed & then painted in Dulaluminium, poly caps were fitted inside this & the inner part of one of the knee joints (F2) then the unit goes together with the other side of the knee joint. The completed section was primed & painted & allowed to dry.
Base aluminium colour sprayed onto knee joints of Zaku II
Hardly any of this will be seen in the finished kit, but when I come to the final assembly there will be some detailing added.

Friday, 20 May 2016

1/48 Zaku II - Part 1


The 1/48 Zaku II is in the “Mega size” range from Bandai, but the kit itself does not have that many parts & the inner frame does not have that much detail compared to say a PG or even an MG Zaku.   That being said it was nice to use it for a practice bed on some ideas on paint schemes & effects without having to worry about ruining an expensive kit.
The instructions show a lot of the sprues are designed to snap together before the parts are removed, but as I will be filling & painting the kit I’ll stick to the more standard way of making a model.
A lot of this kit will be primed using a method I found works for this kind of plastic where a light spray of Halfords car primer is put on first, then a very light sand & clean before Vallejo primer goes on top.

The first area I started on is the feet. The bottom sections are made of just 2 parts & after fitting were given the Halfords undercoat then Vallejo Black primer (70.602) that gives a satin effect.  
Feet of Zaku II primed in black paint
The ankle joint is going to have some detail painting done later, so to start with I made the ankle joints as shown in stages 7 & 8, but please pay attention to how parts G2 & G3 go on the ankle as the larger piece must go on the front facing end.
These were undercoated then painted in Vallejo “Metal Color” Dualuminium.

Ankle joints on Zaku II finished & 1st paint coat
Looking at the pieces they needed a bit of detail painting done just to enhance them. I used some Vallejo “Metal Color” Steel (77.712), Copper (77.710) & Ammo Of Mig Brass (A.MIG-0197) on the pistons, recesses & fixing joints.
Detail added to ankles of 1/48 Zaku II 

The upper parts of the feet were primed on both sides & the detailed ankle joints put in with the poly caps. When I looked at the feet I was not happy with the size of gap in the joints and I used my normal plastic filler & after sanding checked to see how it was looking.
Sanded & filled lower feet on 1/48 Zaku II

To me it just needed the final touch of some very thin superglue to go over the filler & that will then seal any micro holes to give a very smooth finish for priming again later.

Friday, 29 April 2016

1/35 "Ingram 2" Patlabor - Part 6


Time now to do some work on the front of the body. The lens are meant to be amber, these were painted with Crystal Orange as in part 2 of the blog.  Satin Black was used for the grills & the lens pushed into those. I found that the grill were very hard to push into place & had to get a file to the inside of parts A13 & A14 to make them fit better.

At this stage I pushed in the shoulder joints to the body & they go in with a clicking sound as the ball joints sits in the body.  The lower body covers (A7 & A9) were sprayed Satin Black then put in place.
 

The body is coming together nicely & the top ½ needs some attention. The shoulder armour, lower access hatch (B29) & all the top armour pieces were done in White primer & the fixing bracket for the hatch in Plate Mail.  The shoulder armour went together over the lights with a poly-cap in place inside & then pushed onto the remaining ball joint in the shoulder. The upper hatch was done in Satin Black then fitted to the arms that come out by the HUD.   The top armour & neck gaiter just plug into position.
 

Let’s start to put this bad boy together.
The elbow armour was sprayed white then then the gaiter for the arm pushed over the arms & then this unit & the elbow armour fit into the shoulder joint on the main body. The head just clicks into place on the top & the waist then fits at the bottom. 
The gaiter for the waist can be pushed into place with a cocktail stick or the blade of a small flat screwdriver. The painted shoulder pads were pushed into place, and then the gold crest fits to the front.
The armour for the upper part of the legs were painted & fitted to the earlier made units & are pushed into place on the lower leg through the gaiter for the knees.

One of the final parts is to make the weapons & shield.  The shield is a simple 2 part unit painted black & white.
The pistol was painted in satin black, then to give some detail the grip was painted with mix of dark brown & matt black & the chamber in plate mail primer & then fitted. The night stick was in satin black & “Ammo Of Mig” rubber (AMIG-033). The shotgun was done in Aluminium, Gun metal & the pump action section satin black.

A large majority of Japanese kits use rub down transfers & stickers instead of water slide decals that I am more used to, so still perfecting the art of doing it right. This kit comes with 2 types, so decided to lay them out & see which would look best on the kit.
The trick with rub down transfers is to use some low tack masking tape to hold it in place while you rub so the transfer doesn’t move & split.  
Just a simple case of fitting the legs, shield & deciding what weapon to have & the Ingram is done.


Friday, 22 April 2016

1/35 "Ingram 2" Patlabor - Part 5


Time to work on the head. As I am spraying the model it was easier for me to make the LHS antennae (L19,L20 & L22) first so I could sand any seam lines down, give it a coat of White primer, then mask off the tip where the sticker goes & spray that area in U.S.Grey. 
Part J13 comes in clear Green, but you need to mask off a lot of the centre part & all the back of the visor then spray it White to get the right effect. 
Bar parts J14 & J7 all the other head parts were coated with White primer.
Just be gentle when pushing these parts together as some are very small & may snap.
Here comes the part we’ve all been waiting for with this kit… Oh yes flashing lights.

Before putting the light unit in I had tested that they worked, the unit sits in the back of the body & the 2 main cables come out of the side.
The back panel (N1) was sprayed in Plate Mail primer & when dry screwed into place. At this stage it is best to make sure that you have the lights facing the right way. The 4 lights should face forwards & only 2 LED’s should face backwards.
You need to make a pair of coupling arms in section 29 & these do not need to be painted. 
Best way I found to fit these over the cables was to fit the support rings E5 to the rubber gaiters first, then gently slide them over the light unit & then to fit the couplings arms inside the gaiter. Just to be sure I checked the lights still worked.
Gently push the connectors into the side of the body & you may here a slight click so you know they are in place.
The light supports (I5 & I4) were sprayed white & then fitted to the light unit. Make sure again before you do that you have the 4 LED’s facing forwards then the red lens just clicks on top.

Friday, 8 April 2016

1/35 "Ingram 2" Patlabor - Part 4


Now to work on the Ingram’s arms.
The top joints are both the same & as they will not be seen on the finished kit I just screwed them together as in section 11 of the manual.   The right hand side lower arm is meant to slide down so he can reach the gun mounted in the leg & does need a bit of work.
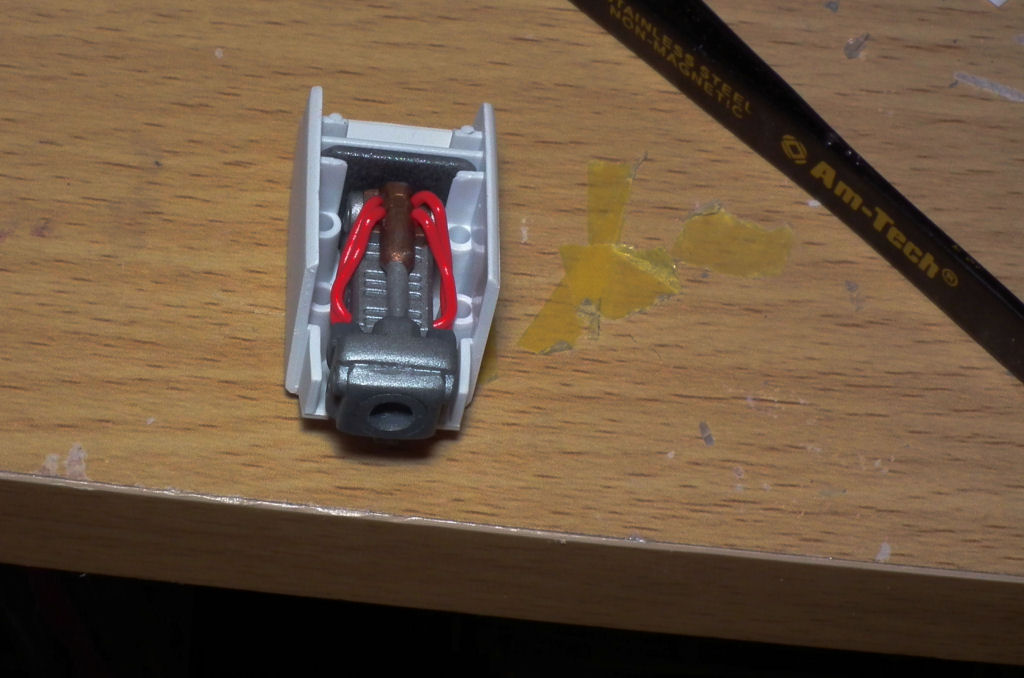
The sides of the arm & rear plate E6 were painted Plate Mail primer, the sliding beam & fixing clip in Magnesium & the piston in Plate Mail & a copper top section. The left arm comes in just 2 pieces & was done in Plate Mail & copper. The outer armour pieces (B30,B31,B32 & B33) were sprayed in the White primer.

 You need to cut 2 pieces of red wire that go through the arm & bend into place.  The completed lower arm sits into the armour.

The end caps (A16) were sprayed in Satin Black then they push into place on the arm.

The hip joint is a simple 3 piece unit that screws together, the connecting joint D13 pushed into place, then sprayed in Plate Mail primer.

 The outer casing for the hips (B38) had the winch fitted & then sprayed in White primer.  The winch cable was hand painted in Aluminium & then a black wash to bring out the depth of the cable more.
This unit then pushes into the waist section that was done back on part 2 of this blog.

Thursday, 31 March 2016

1/35 "Ingram 2" Patlabor - Part 3


 Time to do some work on the cockpit area even though a lot of it will never be seen again J.

The seat comes in 3 parts with the rear bulkhead details moulded on the main part.  I used Vallejo Grey primer for a base coat.


The rest of the seat & bulkhead were highlighted in Vallejo U.S.Grey (71.047), Fire Red ( 71.084), Black (71.057) & Plate Mail primer.


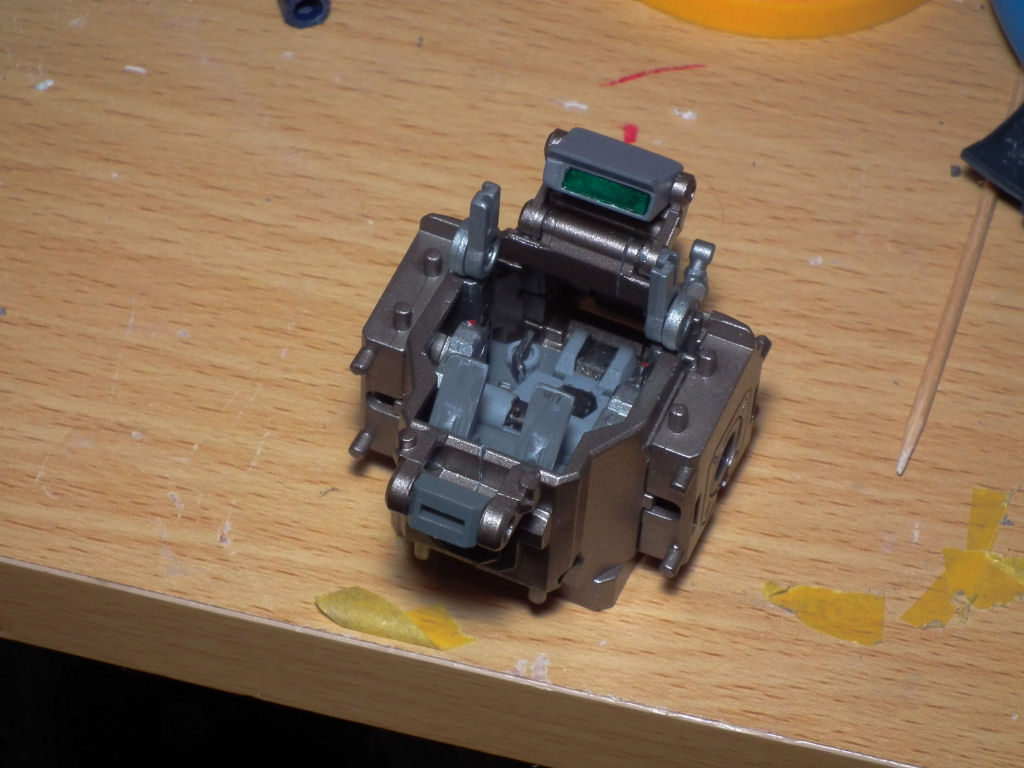
The side walls of the cockpit were sprayed with Grey primer, then 3 coats of Exhaust Manifold. To try & represent the display screens I used  “Ammo Of Mig” Crystal Green (A.MIG-092), but in the pictures it just doesn’t show the deep colour it gave.


The cockpit was screwed together as in section 24, where the poly caps & some small parts were fitted.  Please pay attention on how to fit parts D10 & D9 as they need to go in before you screw it together.
They need to go on the inside of the cockpit horizontally to click in place then gently rotate them so they sit upright.  The side pods of the body (D21 & D22) were sprayed the same way as the cockpit & the arms (D16,D17,F1 & F2) in Plate Mail primer. These parts then fit onto what now has become the body of the Ingram.

 The completed flip down screen (F9 & F10) were primed, then painted in U.S.Grey. This time I brushed some Aluminium (71.062) first into where the screen should be & when dry used the Crystal Green. As you can see this gave a much better result.    


The final part for now on the body was to lower body panel B37, which has been sprayed with the White primer & the grey rubber boot that should have gone on the waist.  The reason I fitted it here was there are 2 pegs it has to sit on at the front of the body & I could see it was easier to get these fitted first then place the lower body panel over the boot to lock it in position.

I am still not happy with how these rubber parts look even with the seam lines taken out & I wish there was a way to totally remove the mould lines & not ruin the detail.