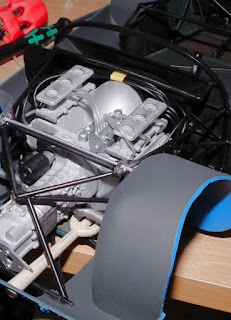
In section 8 I made the rear space frame making sure parts G10 & F5 will move as this helps with fitting later. In section 9 personally I cannot see how the rear subframe sides will sit on it's own in a stable position for either mounting the engine or for when they fit the rear bulkhead. So just to start I fitted the painted lower links to the chassis, then fitted the engine mount to fix it in place. To go with the colours of the interior frame I painted some of the support beams in satin black.
Before fitting the engine I dry fitted just the rear bulkhead in place & then glued the 2 side supports A7 & A8 to the back. After allowing it to set overnight I took it out & sprayed the whole unit satin black.
I glued the completed rear bulkhead in position then found it easy to mount the engine into the rear first & only needed a small amount of glue on the bottom mount & the fixing point on the rear bulkhead. The pre assembled space frame was glued onto the top of the rear framework & attached to the rear of the chassis.


No comments:
Post a Comment