Models made by Airbrushheaven staff

Models made by Airbrushheaven staff

Wednesday, 15 June 2016

1/48 Zaku II - Part 4

 I want to do some detail work on the head & as part of the colour scheme there is going to be a fair amount of metallic paint on show, so the finish will have to be smooth.

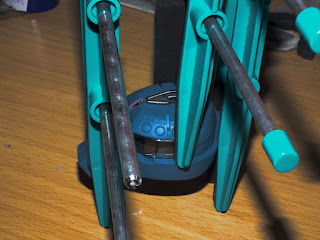
The lower head & neck area is made of 3 pieces & a large polycap where the eye sits. This was primed & painted with Vallejo Plate Mail primer (VAL 70.628).   The 2 head side pieces were primed as normal.
Primed head parts of the Zaku II

To follow the blue/grey colours I am using UK Mediterranean Blue the same as the legs.
Zaku’s eye is a simple 2 part unit & the main section was done the same as the neck with the clear eye painted inside with 3 thin coats of Ammo Of Mig Crystal Red (A.MIG-0093) that will just push into place.
Main parts of the Zaku II head painted


I used a small amount of glue on the front & back of the head just to help seal the joint lines that may need filling & sanding later.
Clamps holding head together while it dries

To say I was unhappy with the seam line on the head was an understatement, would ruin the look & would make me grumble every time I saw the finished kit. A quick 2 stage fill & sand resolved this, then masked off most of the head & touched up the primer/blue top coat. To add a bit of detail to the inner part of the head I used some  “Metal Color” Steel & Ammo Of Mig Brass just to lift some of the mouldings out.

The top of the head was painted in the same blue after fitting his crest. Now for some “bling” on the energy cables. These may be small pieces but they did need a lot of gentle sanding & filling to get the desired smoothness of each of the bands, but I can assure you it is well worth the effort. The cables were undercoated & sprayed with gloss black.

The reason for the gloss is the next coats I am going to put on are light covering of Vallejo Chrome (77.707) to provide a nice shine & then a couple of light oversprays of Ammo Of Mig metallic blue (A.MIG-0196) that are just enough to provide a light blue tint.

Painted energy cables ready for fixing


When put together this has made the head come alive in my view & the rest of the Zaku’s not far off now.
Finished Zaku II head unit

Friday, 3 June 2016

1/48 Zaku II - Part 3


Time to do a bit of work on the torso, but with the way the kit is made there are very few parts for such a big kit & again only some painting will enhance the model.  The main upper torso is only 2 parts with polycaps & the shoulder joints added.  All that was needed was a bit of filler & sanding before my standard priming routine. All the waist torso consists of is 2 parts & a polycap.
1/48 Zaku II torso primed ready for top coat
 
I made an error with the side armour for the torso so it was given a sanding due to me getting a bit too vigorous with the scalpel blade when trimming off the nubs & then primed for later painting.

Side armour primed on 1/48 Zaku II
 
The shoulder joints are very basic with an inner piece fitted with polycap that sits inside 2 more polycaps.  To give a bit of detailing the inner pieces were primed then sprayed in Aluminium., when dry I put some masking tape over them, fitted them in place & then glued the 2 shoulder joints together. These were sanded filled & primed ready for the top coat.
completed & primed shoulder joint on Zaku II 

To make the elbow joint I used, like the knee, a normal way of modelling & not the way they show. Please check the way the poly caps fit at the bottom as I forgot & wondered why it would not go together at first. Like with knee part F10 was primed, painted in Dulaluminium before fitting then the finished unit primed & painted in the same colour.
1/48 Zaku II painted elbow joint
 
Not much work needed to make the lower arm as it’s just 2 pieces with polycaps, so it was glued, sanded then primed as usual.
Primed lower arm section on Zaku II